Fixing Adhesion Failure After Powder Coating Cure
Powder coating adhesion failure appears as peeling or delamination after cure. Fix it by identifying surface contamination, improper pretreatment, or cure issues. Use specific repair methods and strict prevention to stop recurring defects.
- Identify the specific failure mode before attempting a repair.
- Surface contamination and pretreatment errors are the most common causes.
- Use mechanical abrasion or chemical stripping for severe delamination.
- Prevent recurrence by tightening pretreatment and cure controls.
Powder Coating Adhesion Failure: Causes, Diagnosis, and Repair
Powder coating adhesion failure shows up as peeling, flaking, or delamination after the cure cycle completes. This defect compromises the finish and exposes the substrate to corrosion. The root cause is almost always tied to surface preparation, cure parameters, or material incompatibility. Understanding the failure mode helps determine whether the issue is localized or systemic.
What does adhesion failure look like?
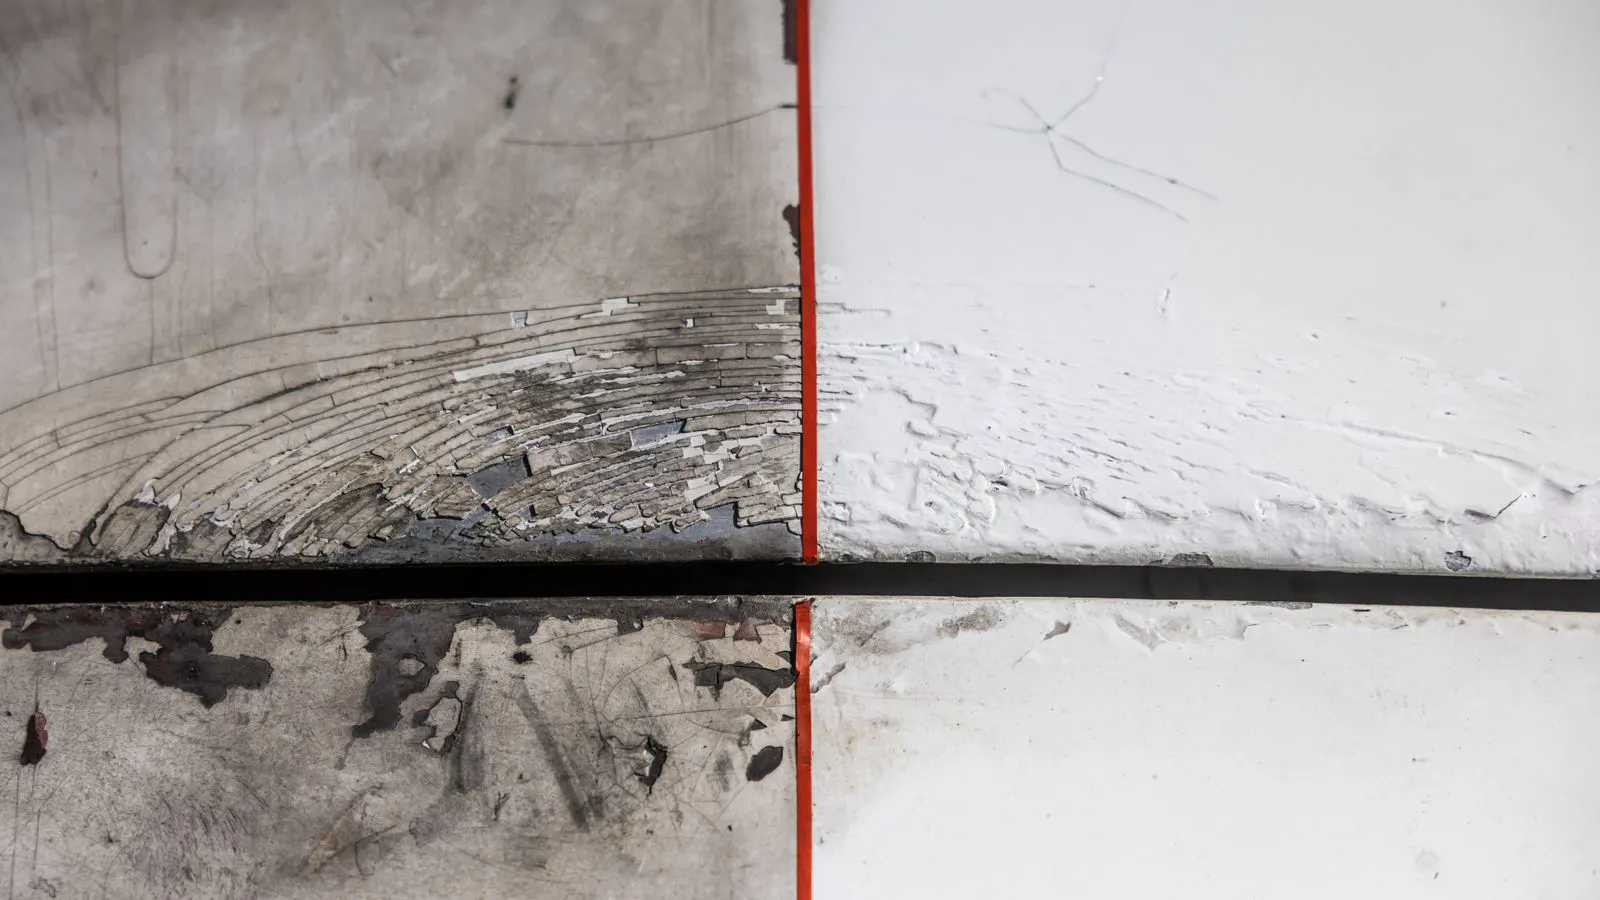
Visual inspection reveals several distinct patterns. Small flakes near edges suggest mechanical damage during handling. A continuous sheet lifting from a panel indicates poor bond formation. Web-like cracking across the surface points to internal stress or substrate movement. The area affected often correlates with high heat zones, sharp corners, or areas with residual oils.
Engineers should document the failure location, size, and shape. Photographs with scale markers help trace the defect back to the production line. A simple test using a fingernail or a small abrasive pad can separate superficial flaking from deep delamination.
Specific examples of these patterns include:
- Edge Flaking: Common on sheet metal brackets with sharp corners. This usually happens when the part hits a pallet edge during loading.
- Panel Delamination: Seen on large automotive or appliance panels. This often results from a pretreatment bath that ran out of acidity or alkalinity during a long production run.
- Stress Cracking: Frequently found on castings. The metal expands and contracts with temperature changes, and the rigid coating cracks along stress lines.
Common causes of peeling after cure
The table below lists the most frequent symptoms and their underlying causes. Matching the symptom to the cause guides the repair strategy.
| Symptom | Likely cause | What to do |
|---|---|---|
| Flaking at edges or corners | Mechanical impact during handling or shipping | Inspect packaging and handling procedures. Re-coat damaged areas. |
| Uniform peeling across large panels | Incomplete pretreatment or residual oils | Strip the coating. Re-clean and re-pretreat the surface. |
| Delamination near weld seams | Heat-affected zone contamination or poor weld prep | Grind weld areas. Apply high-temperature primer if needed. |
| Web-like cracking over the finish | Substrate movement or incompatible coatings | Remove the finish. Check for warping or substrate defects. |
| Pinholes that peel out | Poor powder flow or cure temperature | Inspect powder hopper and gun. Adjust cure schedule. |
How to assess the severity of the defect
Start with a visual check under bright, diffuse lighting. Hold the part at an angle to catch shadows. Look for bubbling, which often precedes delamination. Use a magnifying lamp for small components.
Next, perform a physical test. Gently press the coating with a fingernail or a soft plastic scraper. If the coating moves or lifts, the bond is weak. Do not use a metal tool unless you are prepared to remove the coating entirely. A tape test can also reveal weak adhesion, though it may damage the finish.
For critical applications, send a sample to a laboratory. They can perform cross-section analysis to see where the bond failed. Did it break at the substrate interface, within the coating, or at a primer layer? This information determines the repair method.
When assessing severity, consider the environment. A scratch on an indoor office furniture leg is a cosmetic issue. A small crack on a structural steel beam exposed to salt air is a safety risk. The repair strategy depends entirely on the risk profile of the part.
Repair methods for minor peeling
Small, isolated defects often require local repair. Begin by removing the loose material. Use a fine abrasive pad or a low-speed rotary tool with a small bit. Work until the surrounding coating is solid and the substrate is clean.
Sand the area with fine-grit sandpaper, moving from 120 to 220 grit. Feather the edges so the repair blends into the existing finish. Wipe the area with a solvent cleaner to remove dust and oils. Let it dry completely.
For small pinholes or flakes, you can touch up with a compatible powder. Use a small applicator to apply the powder. Cure the area using the same temperature and time settings as the original batch. If the original cure data is unavailable, use the standard cure for that powder type.
For larger peeling areas, spot repair is rarely sufficient. The bond failure often extends beyond the visible defect. Strip the affected zone and recoat it as part of a larger area.
Practical example: A stainless steel control panel in a food processing plant had a small flake on a corner. The technician removed the loose powder, cleaned the spot with isopropyl alcohol, and applied a compatible touch-up powder. The part was cured in the same oven at the same temperature. The repair held for two years without re-failure.
Repair methods for extensive delamination
When the coating peels in large sheets, local repair will not hold. The entire affected area needs removal. Use a chemical stripper if the substrate can withstand the solvent. Follow the manufacturer’s instructions for application time and neutralization.
For heat-sensitive parts, mechanical stripping is safer. Use a low-speed rotary tool with a wire wheel or a scraper. Work carefully to avoid damaging the substrate. After removal, clean the surface thoroughly.
Once the substrate is clean, re-pretreat it. The pretreatment step is critical for powder coating adhesion. Use a phosphoric acid or chrome-free pretreatment solution as specified by the powder supplier. Rinse and dry the part completely.
Recoat the part using the original powder or a compatible alternative. Ensure the cure cycle matches the powder specifications. Overcuring can embrittle the coating and cause future adhesion issues.
Practical example: A batch of aluminum window frames peeled uniformly off the substrate. The coating was stripped using a low-speed abrasive wheel. The frames were then re-pretreated with a chrome-free phosphoric acid solution. After drying, the frames were recoated with a standard polyester powder. The new finish adhered well and passed salt spray testing.
Prevention strategies to avoid recurrence
Prevention is far cheaper than repair. Start with the surface preparation process. The substrate must be clean, dry, and free of oils, rust, and mill scale. Use a degreaser that is compatible with the substrate and the pretreatment chemistry.
Pretreatment is the single most important step for adhesion. Follow the supplier’s recommended dilution, temperature, and contact time. Monitor the bath chemistry regularly. Out-of-spec baths cause inconsistent adhesion.
Check the cure cycle. Powder coatings have specific temperature and time requirements. Too low a temperature leaves the coating soft. Too high a temperature can cause yellowing or embrittlement. Use a reliable oven thermometer and verify the cycle regularly.
Store the powder correctly. Exposure to humidity or heat can degrade the powder. Keep it in its original container and use it before the expiration date.
Train operators on handling and packaging. Many adhesion failures occur after the coating is cured. Protect the finish during inspection, assembly, and shipping.
Practical example: A manufacturer of steel guardrails reduced adhesion failures by 80% over six months by implementing a routine bath chemistry check every shift. The operator used a pH meter and conductivity meter to verify the pretreatment solution was within spec. This simple habit stopped the peeling caused by a degraded bath.
When to escalate to a supplier or lab
If the defect persists after repair and prevention, escalate the issue. Contact the powder coating supplier. Share photographs, cure data, and substrate details. They may identify a batch problem or a compatibility issue.
Send a sample to a third-party laboratory if the supplier cannot help. Cross-section analysis and adhesion testing can pinpoint the failure mechanism. This data is valuable for warranty claims and process improvement.
Keep records of all failures. Track the defect rate over time. A sudden increase often points to a specific change, such as a new substrate batch or a new powder lot.
Practical example: A company producing automotive brackets noticed a spike in peeling failures. They contacted the powder supplier and provided cure logs and substrate lot numbers. The supplier identified that the specific powder lot had a higher moisture content, which reduced adhesion. The company switched to a different lot and the problem disappeared.
Common mistakes that delay resolution
Many engineers waste time on the wrong repair. They try to touch up a delaminated area without removing the loose coating. The new powder bonds to the weak layer and fails again.
Another mistake is ignoring the substrate. If the metal is contaminated or poorly pretreated, no amount of recoating will fix the adhesion. Always go back to the surface.
Some operators skip the drying step after pretreatment. Moisture trapped under the coating causes bubbling and peeling. Ensure the part is dry before applying powder.
Finally, do not assume the cure cycle is correct. Oven hot spots can cause uneven cure. Verify the temperature at multiple points in the oven.
Practical example: A technician tried to touch up a peeling area on a steel cabinet. He applied powder directly over the loose edge. The new coating cured, but the old loose powder underneath still moved. The repair failed within a week. The correct approach was to remove the loose powder, clean the substrate, and then apply the new powder.
Final thoughts
Powder coating adhesion failure is a solvable problem. Identify the symptom, trace the cause, and apply the right repair method. For minor defects, spot repair works. For extensive delamination, strip and recoat. Prevention through clean surfaces, proper pretreatment, and accurate cure cycles stops the issue before it starts.
Frequently asked questions
Can I just paint over a small peeling area?
No. You must remove the loose coating and clean the substrate first. Painting over a weak bond will fail again.
What is the best way to remove delaminated powder coating?
Use a chemical stripper for heat-sensitive parts. Use mechanical methods like low-speed rotary tools for others.
How do I know if my pretreatment is working?
Monitor the bath chemistry regularly. Rinse water should be clear. The surface should not show residual oils or rust.
Does high temperature cure improve adhesion?
Not necessarily. Excessive heat can embrittle the coating. Follow the powder supplier's recommended cure schedule.
Can I prevent peeling by changing the powder type?
Sometimes. If the current powder is incompatible with the substrate, a different powder may help. But surface preparation is still the primary factor.