Why Powder Coating Peels: Common Adhesion Failure Causes
Powder coating peeling is usually caused by poor surface preparation, contamination, or improper curing. This guide lists common peeling symptoms, adhesion failure causes, and prevention steps to help engineers diagnose issues and protect coated products from early failure.
- Paint adhesion problems often begin before coating is even applied, with contamination or inadequate surface prep.
- Blistering and peeling after curing can signal trapped moisture, oil, or improper bake conditions.
- A structured troubleshooting approach using symptoms, causes, and fixes helps isolate the root cause quickly.
- Consistent QC at surface prep, application, and cure stages prevents most adhesion failure issues.
Why Does Powder Coating Peel in the First Place?
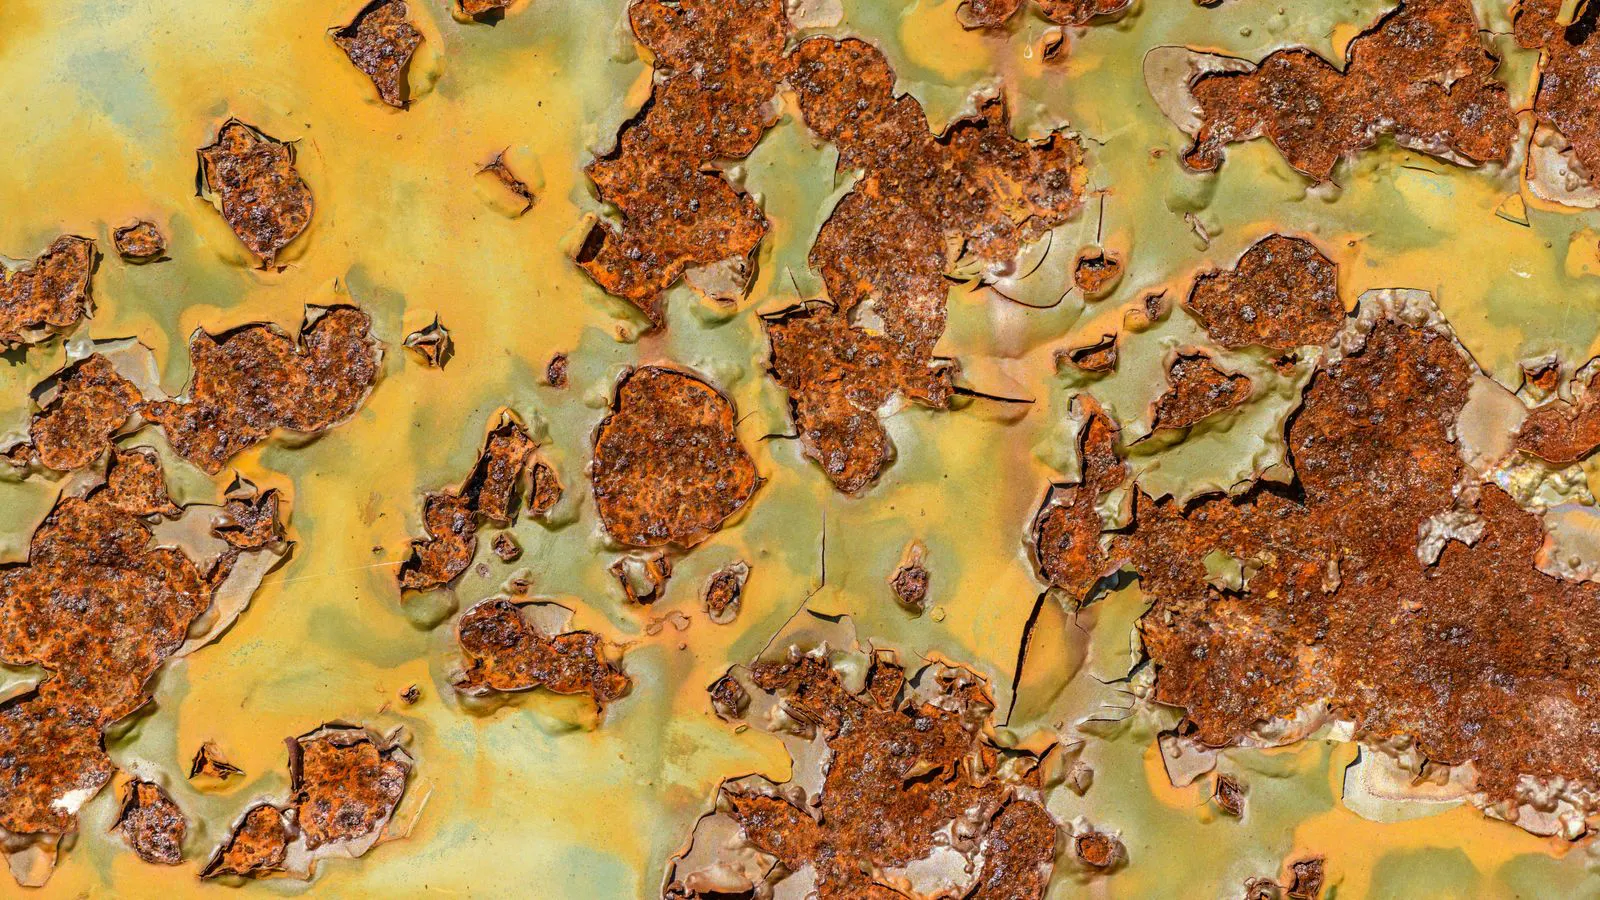
Powder coating is a durable finish, but it is not immune to defects. When a coating peels, blisters, or flakes, the result is almost always a breakdown in the bond between the coating and the substrate. In professional environments, this type of paint adhesion failure can lead to product rejection, warranty claims, and costly rework.
The good news is that peeling rarely happens for a single, mysterious reason. Most cases can be traced back to a small set of practical issues: contamination, inadequate surface preparation, improper application, or cure problems. The following sections walk through the most common symptoms, likely causes, and corrective actions so you can diagnose and prevent adhesion failure before it becomes a production problem.
Common Symptoms of Adhesion Failure
Before jumping into causes, it helps to identify what the failure actually looks like. Different symptoms point to different root causes, and misdiagnosis can lead to the wrong fix. The table below summarizes the most frequent peeling and blistering patterns observed in powder coating.
| Symptom | Likely cause | What to do |
|---|---|---|
| Flaking or peeling in large patches | Oil, grease, or silicone contamination on the substrate | Strip and re-etch the affected area; verify solvent-free cleaning before recoat |
| Blistering or bubbling after cure | Trapped moisture or solvents released during the bake | Improve drying time before application; check for hidden corrosion or surface water |
| Peeling along weld seams or edges | Heat-affected zones or residual flux not removed | Post-weld cleaning and passivation; re-etch weld zones before coating |
| Pinholes or localized lifting | Insufficient film thickness or poor flow | Increase application thickness; adjust gun distance and voltage settings |
| Chalking or surface crumb | Over-cure or UV degradation | Verify cure temperature and time; consider UV-resistant topcoat if needed |
| Peeling only on certain parts | Inconsistent surface prep or batch contamination | Audit prep logs per batch; standardize cleaning and rinse procedures |
If the failure appears uniformly across a part, the cause is likely systemic, such as a cure parameter shift or a change in cleaning chemical. If it is localized, look for part-specific issues like weld flux, handling oils, or mechanical damage.
Surface Preparation: The Most Common Root Cause
The single most frequent cause of paint adhesion failure is inadequate surface preparation. Powder coating bonds best to clean, roughened, chemically etched, or blast-etched metal. If the substrate still carries oil, grease, mill scale, rust, or release agents, the coating will adhere poorly and peel over time.
Practical checks to perform:
- Visual inspection under good lighting. Look for shiny spots, oil films, or rust that are not visible from a distance.
- Tape test. Apply strong packing tape to a cleaned, dry area and peel it off sharply. If the tape lifts any residue, the surface is not ready.
- Water test. Spray water on the cleaned surface. If beads form instead of spreading, contamination is likely present.
- Etch consistency. Confirm that the acid etch or phosphate treatment is within the correct concentration, temperature, and time range.
Even a small amount of silicone from a mold release agent or handling glove can cause localized peeling. Because the defect may not appear until months later, it is critical to standardize and document the cleaning process.
Contamination and Handling Issues
Contamination is a sneaky cause of adhesion failure because it often originates after surface prep. Parts that were cleaned and etched but then handled with bare hands, stored in dusty areas, or contacted by silicone can develop oil or grease films that prevent proper paint adhesion.
Common contamination sources include:
- Grease and oils from machine shop operations, transfer, or handling.
- Silicone residues from molds, packaging, or release agents.
- Dust and particulates that settle on wet or etched surfaces before coating.
- Residual flux or salts from welding, brazing, or galvanizing.
To reduce risk, keep cleaned parts in a controlled area, use nitrile or dedicated gloves, and avoid storing etched parts near open containers of chemicals. If a part is going to sit before coating, consider a light solvent wipe or a final rinse immediately before application.
Application and Film Thickness Problems
Paint adhesion depends on both the chemical bond and the mechanical interlock between the coating and the substrate. If the film is too thin, it lacks the mechanical strength to resist stress, abrasion, or thermal cycling. If it is too thick, it may trap solvents or fail to flow properly, creating weak spots.
Key application factors to review:
- Film thickness: Confirm the coating meets the minimum specification for the intended service. Use a magnetic or ultrasonic thickness gauge to verify.
- Application method settings: For spray powder coating, gun distance, voltage, and material flow rate all affect film uniformity.
- Substrate temperature: Coating onto a cold part can reduce flow and adhesion. Preheating to the recommended range improves wetting.
- Multiple coats: If a second coat is needed, ensure the first coat has reached the proper tack or flash-off stage.
Thin films are especially prone to peeling at edges, corners, and high-stress areas. If you notice pinholes or lifting only at sharp radii, the issue is often insufficient build-up in those zones rather than a surface prep failure.
Curing and Thermal Issues
The cure step is where powder coating transforms from a dry powder into a solid, fused film. If the cure profile is incorrect, the coating may look acceptable but fail adhesion tests or peel under normal use.
Common cure-related causes of peeling:
- Insufficient cure temperature or time. The coating never fully cross-links, leaving it soft and weak.
- Over-cure or excessive temperature. The coating can become brittle and crack, especially if the substrate experiences thermal shock.
- Rapid quenching. Cooling too quickly after the bake can create internal stresses that lead to blistering or lifting.
- Inconsistent oven airflow. Hot spots or cold zones cause uneven cure, resulting in patches that peel while neighboring areas hold.
To verify cure, perform a bend test, scratch test, or adhesion tape test after cooling. If the coating fails these tests, review the oven temperature mapping and dwell time. In many cases, a small increase in cure time or a slight adjustment to the peak temperature resolves the issue.
Preventing Paint Adhesion Failure in Production
The best way to handle peeling is to prevent it. A structured quality control routine at each stage of the process catches problems before they become field failures.
- Standardize surface prep. Document etch chemistry, concentration, temperature, and time for every part family. Change logs should be kept when formulations or suppliers change.
- Control contamination. Separate clean and dirty areas, use dedicated tools for each step, and perform regular wipe tests on critical parts.
- Verify film thickness. Measure at multiple points on representative parts and log the results. Keep records that tie thickness to lot or batch.
- Monitor cure parameters. Record oven temperature, time, and airflow settings for each batch. Use thermocouples to verify actual part temperature, not just oven setpoint.
- Run adhesion tests. Use tape pull or scratch tests per the relevant standard or internal specification. Even a small sample of parts per batch can reveal trends early.
- Train operators. Ensure everyone who handles parts before coating understands the risks of contamination and the importance of not disturbing cleaned surfaces.
When to Strip and Re-Coat
Sometimes the practical answer is to remove the failed coating and start over. This is especially common when contamination is widespread or when the substrate itself has corrosion or pitting.
Before recoating:
- Strip the old coating mechanically or chemically, depending on the substrate and coating type.
- Inspect the bare metal for corrosion, pitting, or heat damage.
- Re-etch or blast the surface to the required profile.
- Clean with a solvent or alkaline wash and dry thoroughly.
- Apply a new coat with verified film thickness and cure parameters.
Strip and re-coat is more costly than fixing the process, but it is often the only reliable way to restore adhesion when contamination has penetrated the surface or when the substrate condition is uncertain.
Quick Diagnostic Checklist
If you are facing peeling or blistering, work through this checklist to narrow down the cause:
- Did the part pass visual and wipe tests before coating?
- Was the surface etched or blasted to the correct profile?
- Were parts handled with bare hands or stored in a dirty area?
- Was the film thickness measured and within spec?
- Was the cure temperature and time verified with a calibrated thermometer?
- Did the failure appear uniformly or only on certain parts or areas?
- Have there been recent changes to chemicals, suppliers, or process parameters?
Answering these questions in order usually points to the most likely cause. If the failure is inconsistent across a batch, suspect handling or application. If it is uniform, suspect cure or surface prep. If it is localized to welds or edges, suspect flux, heat damage, or thin film.
Final Thoughts
Peeling powder coating is a solvable problem, but it requires a systematic approach. Most adhesion failure cases trace back to a combination of contamination, poor surface preparation, or incorrect cure conditions. By identifying the symptom, checking the likely cause, and applying a targeted fix, you can reduce defect rates and protect your product from early coating failure.
The key is consistency. The same process that works today must be controlled tomorrow. Document each step, verify the critical parameters, and test your results. When paint adhesion is managed well, powder coating delivers the long-term durability and appearance it is known for.
Frequently asked questions
Can powder coating peel if the metal was not fully dried before coating?
Yes. Trapped moisture can vaporize during the cure and create blisters or voids that weaken the bond. Ensure the substrate is dry before application to prevent this type of adhesion failure.
How can I tell if peeling is caused by contamination or a cure problem?
Contamination often shows up as localized flaking or pinholes, while cure issues tend to cause uniform softness, blistering, or brittle cracking. A tape test and cure temperature log can help distinguish the two.
What is the minimum film thickness needed to prevent peeling?
There is no single universal minimum. The required thickness depends on the substrate, coating type, and service conditions. Check the coating supplier's specification for the minimum dry film thickness.
Does welding always cause adhesion failure?
Not by itself, but weld flux, heat-affected zones, and residual salts can if not properly cleaned. Post-weld cleaning and re-etching of weld areas significantly reduce the risk of peeling.
Can I just apply a topcoat over peeling powder coating?
No. A topcoat will not fix a substrate adhesion problem. The failed coating must be stripped, the surface cleaned and re-prepped, and a new coat applied for a durable repair.